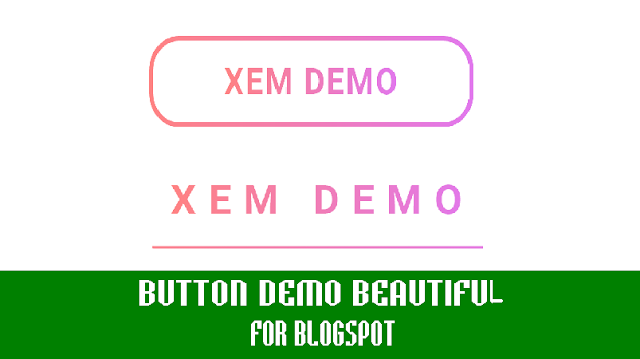
Bước 1: Chèn đoạn CSS sau vào dưới thẻ <style> của Blogspot:
.btn_tkn {
transition: .4s;
position: relative;
display: inline-block;
width: 160px;
font-size: 1em;
font-weight: bold;
line-height: 45px;
text-align: center;
text-transform: uppercase;
background-color: transparent;
cursor: pointer;
text-decoration:none!important;
font-family: 'Roboto', sans-serif;
font-weight:900;
font-size:15px;
letter-spacing: 0.045em;
}
.btn_tkn svg {
position: absolute;
top: 0;
left: 0;
}
.btn_tkn svg rect {
//stroke: #EC0033;
stroke-width: 2;
stroke-dasharray: 353, 0;
stroke-dashoffset: 0;
-webkit-transition: all 600ms ease;
transition: all 600ms ease;
}
.btn_tkn span{
background: rgb(255,130,130);
background: -moz-linear-gradient(left, rgba(255,130,130,1) 0%, rgba(225,120,237,1) 100%);
background: -webkit-linear-gradient(left, rgba(255,130,130,1) 0%,rgba(225,120,237,1) 100%);
background: linear-gradient(to right, rgba(255,130,130,1) 0%,rgba(225,120,237,1) 100%);
filter: progid:DXImageTransform.Microsoft.gradient( startColorstr='#ff8282', endColorstr='#e178ed',GradientType=1 );
-webkit-background-clip: text;
-webkit-text-fill-color: transparent;
}
.btn_tkn:hover svg rect {
stroke-width: 1;
stroke-dasharray: 123, 660;
stroke-dashoffset: 607;
}
.btn_tkn:hover {letter-spacing: 0.3em}
}
Bước 2: Chèn đoạn JS sau vào phía trên thẻ </head>:
<script>
function demotkn (textdemo, linkdemo, titlelinkdemo) {
document.write ("<center><a href='" + linkdemo + "' title='" + titlelinkdemo + "' target='_blank' class='btn_tkn'><svg width='160' height='45'><defs><linearGradient id='grad1'><stop offset='0%' stop-color='#FF8282'/><stop offset='100%' stop-color='#E178ED' /></linearGradient></defs><rect class='vxt_tkn_contetw3' x='5' y='5' rx='13' fill='none' stroke='url(#grad1)' width='150' height='35'></rect></svg><span>" + textdemo + "</span></a></center>");
}
</script>
Bước 3: Vì nó có nhiều hiệu ứng CSS nên khi chèn sẽ cần rất nhiều thẻ như SVG, RECT... Chính vì vậy mình đã dùng JS rút gọn như ở bước 2. Ở bước này là bước chèn vào nơi hiển thị. Khi chèn vào bài viết hay 1 trang, các bạn chuyển sang chế độ HTML rồi chèn đoạn JS sau vào nơi muốn hiển thị Button:
<script>Văn bản hiển thị đơn giản là text sẽ hiển thị của button, ví dụ: XEM DEMO chẳng hạn.
demotkn ("văn bản hiển thị", "url demo, download", "title url");
</script>
Url Demo, download là liên kết tới 1 Demo hay Download. VD: http://demo.linkthuthuat.com/2018/01/demo-button-khanhbloggerdotcom.html
title url là tiêu đề liên kết, bạn có thể không cần thêm nó !
VD CODE:
<script>Như đã nói thì đối với những bạn không quan tâm SEO thì có thể bỏ title URL, lúc đó code sẽ là:
demotkn ("XEM DEMO", "http://demo.linkthuthuat.com/2018/01/demo-button-khanhbloggerdotcom.html", "Tạo nút Demo - Download với hiệu ứng hover màu sắc tuyệt đẹp cho blogspot");
</script>
VD:
<script>
demotkn ("XEM DEMO", "http://demo.linkthuthuat.com/2018/01/demo-button-khanhbloggerdotcom.html");
</script>
Với một Button với nhiều hiệu ứng màu sắc hover như vậy nhưng khi chèn vào blog thì rất nhỏ gọn đúng không nào ! Mặc dù là JS nhưng nó KHÔNG hề ảnh hưởng đến tốc độ tải trang nhé !
Hi vọng với nút Demo - Download với hiệu ứng hover màu sắc tuyệt đẹp này sẽ giúp blog các bạn đẹp hơn như cái nút :v cũng như tăng tính chuyên nghiệp hơn !
Chúc các bạn thành công ! Tags: Blogspot Tips

